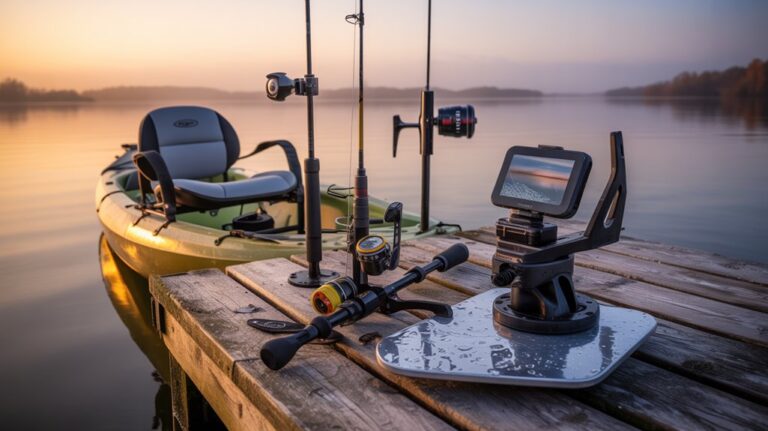
Kayak Fishing in Current: Keep the Bow Out of Trouble starts with one decision: can you keep the kayak pointed into the flow and release the anchor immediately if conditions change? Read the water first, then choose to anchor, control your drift, move to shore, or stay off the water.
Free Printable Field Reference & Checklist (PDF)
Save or print our one-stop reference sheet for this guide: Moving-Water Kayak Positioning and Quick-Release Anchor Safety Checklist. Includes the full specification comparison matrix and step-by-step field checklist.
Key Takeaways
| Decision | What to check | Why it matters |
|---|---|---|
| Anchor or move on | Current, wind, waves, water level, hazards, and a clear escape route | A kayak pinned broadside or against an obstacle can become difficult to free. |
| Choose a line position | Bow or stern attachment, kayak angle, and quick release access | The right position keeps the hull aligned with the flow and lets you release without delay. |
| Set up the trolley | A clear path for the ring and an anchor line separate from fishing lines | Uncrossed lines and an accessible release reduce tangles during a sudden change. |
| Match anchor and line to the bottom | Grapnel for a suitable firm bottom, mud style for soft bottom, and enough scope | The anchor needs to set without putting unnecessary line across hazards. |
| Deploy and retrieve with control | Gradual line payout, stable bow position, and a clear path for retrieval | Loose coils and a loaded line around your body can create a serious entanglement risk. |
| Recheck during every stop | Wind, current, water level, kayak angle, and line load | A safe setup can change when the flow or wind shifts. |
Decide whether anchoring is safe before you launch the line
Anchoring is safe only when you can hold a controlled position and release into a clear route. Read current, wind, waves, and water level together: wind pushing against current can steepen waves, while rising or changing flow can shift the kayak’s angle and increase the load on its anchor line.
Before you reach for an anchor, identify a clear route downstream and toward shore. Check for rocks, strainers, drop offs, submerged branches, and other obstacles that could pin the hull or trap the line.
If the kayak will not hold a stable bow first position, you cannot reach the quick release, or the downstream route is blocked, do not anchor there. Move to shore or avoid the water, because a fishing stop is never worth losing your escape path.
Choose drift control to suit the place. A drift sock slows a controlled drift, a stake out pole can hold in suitable shallow water and bottom, and a bank tie off works only where it leaves a clear release and escape path.
Wear a properly fitted life jacket on every trip. Of fatal boating accident victims with reported life jacket usage, 83 percent were not wearing a life jacket, according to Paddling Business.

Of fatal boating victims with reported life jacket usage, 83 percent were not wearing one.
Source: Paddling Business
For more kayak specific safety and fishing advice, visit our kayak fishing guides. We want every stop to begin with a clear route out.


Choose an attachment point that keeps the kayak aligned
Should you anchor a fishing kayak from the bow or stern? A bow attachment generally helps the kayak point into current and reduces the chance of being pulled broadside, which can expose more of the hull to the flow.
Avoid attaching the anchor line to the side or midpoint. Current can rotate the kayak around that point, and a broadside hull can take on water or be pushed toward a hazard.
A stern attachment suits some deliberate setups, but it is not automatically safer. Use it only when the kayak stays controlled and the stern will not be driven into waves, rocks, or other hazards.
An anchor trolley lets you move the attachment between bow and stern while seated. Stop where the kayak stays aligned with the flow and the quick release remains easy to reach, then recheck if wind, current direction, or water level changes.
Do not move the trolley ring while the anchor line is heavily loaded. Ease the tension or release the anchor first, reposition the ring, and secure it again before setting the line.


Rig the trolley and quick release for a loaded line
Route the anchor trolley so its ring can travel from bow to stern without crossing your seated position, fishing lines, paddle, or other gear. A clean route makes it easier to move the attachment point without snagging equipment.
Connect the anchor line to the trolley ring with a quick release you can reach and operate with one hand while seated. Practice releasing it under light tension before using the system in current, so you know how it moves when your hands are busy.
Keep the anchor line separate from fishing lines, and keep a line cutter within reach. If the release jams or an anchor snags, a cutter gives you another way to free yourself from the line.
Loose rods and tackle can complicate an emergency release, so secure gear that could slide or tangle. For adjacent tackle planning, see our baitcasting combo guide and Garmin Striker Vivid 4cv review, or explore The Reel Authority for more fishing coverage.
Match the anchor and line to the bottom and water depth
A grapnel anchor uses flukes to catch a suitable firm bottom. A mud style anchor suits soft bottom where it can set, while snag prone structure calls for extra caution because a secure release route matters as much as holding power.
Anchor scope is the ratio of line length to the vertical distance between the anchor and the attachment point. In sheltered water, planning around 3:1 to 5:1 gives the line a more horizontal pull, but that ratio does not make anchoring safe in current by itself.
Work out the vertical distance by adding water depth to the attachment point’s height above the water, then multiply by the planned scope ratio. For example, with a 6 foot depth and an attachment point 1 foot above the water, the vertical distance is 7 feet; a 3:1 to 5:1 scope calls for 21 to 35 feet of line.
| Method or setup | Useful conditions | Measurement or check | Main concern |
|---|---|---|---|
| Grapnel anchor | Suitable firm bottom where the flukes can catch | Plan line using a sheltered water scope of about 3:1 to 5:1 | Flukes can snag on rocks, branches, or other structure. |
| Mud style anchor | Soft bottom where the anchor can set | Calculate line from water depth plus attachment height | More line can cross fishing lines or an escape route. |
| Drift sock | Controlled drift when a fixed anchor is unsuitable | Pay out only enough line to keep the sock clear of your fishing gear | Watch for tangles and maintain a route to shore. |
| Stake out pole | Suitable shallow water and bottom | Use only where the pole can set without blocking a release path | Do not force it into unsuitable depth or bottom. |
More line can improve the pull angle, but it also puts more line in the water to snag or tangle. Do not deploy if the line path crosses fishing lines, hazards, or the route you need to escape.
Deploy, set, and retrieve without creating a trap
Face the kayak into the flow, keep the quick release connected and within reach, and pay out the anchor line gradually. Dropping a loose coil can wrap line around a limb, paddle, fishing rod, or your own feet.
Let the anchor settle, then allow the line to load progressively while you watch the kayak’s angle. Retrieve or release if the hull swings broadside, the line pulses sharply, or the anchor drags toward a hazard.
To retrieve, ease the line in steadily and keep it clear of your feet, paddle, and fishing lines. Never wrap a loaded line around your hand or body, because a sudden pull can trap you before you can react.
If the anchor snags, do not haul hard against the current or lean toward the obstruction. Release the line if needed, move only when a clear route exists, and abandon the anchor rather than risk being pinned.
If a fish runs while you are anchored, keep control of the rod without letting the fishing line cross the anchor line. Release the anchor if the fish or kayak pulls the hull toward danger.


Use this field checklist before and during each stop
Run this sequence before deploying an anchor, then repeat it whenever conditions change. A short check keeps the release plan clear before you commit to a fishing position.
- Check the water. Read current, wind, waves, water level, bottom, and nearby hazards; identify a clear route to shore or downstream.
- Choose your control method. Decide whether to anchor, use a drift sock or stake out pole, move to shore, or avoid the water. Do not anchor if the release or escape plan is unclear.
- Prepare your safety gear. Put on a properly fitted life jacket, clear the anchor line path, and make sure the quick release and line cutter are reachable from your seat.
- Set the attachment point. Choose the trolley position that keeps the bow aligned with current, then deploy gradually and check that the kayak holds without swinging broadside.
- Reassess the setup. Recheck after a change in wind, flow, water level, kayak angle, or line load. Release first if the setup becomes unsafe.
Frequently Asked Questions
What is the leading cause of death for kayakers?
A capsize can quickly become an emergency, so keep your life jacket on from launch to landing.
Can a kayak be anchored safely in tidal current?
Yes, in suitable conditions, but tidal flow can change direction and strength during a fishing session. Plan around the tide stage and the return passage, not only the current you see when setting the anchor.
Is it ever safer to use two anchors on a fishing kayak?
Two anchors can hold a kayak in a fixed position in sheltered water, but they also make it harder to turn or release the hull. Use them only when each line has an independent release and you have room to clear both lines without crossing them.
How can I fish while drifting without letting my lines tangle?
Start with one active rod and make short casts, so you can track the lure and retrieve it before it passes behind the kayak. Keep spare rods secured with their lines reeled in, and avoid crossing casts over the drift sock line.
Does a rudder prevent a kayak from broaching in current?
A rudder can help steer while you paddle, but it cannot protect a hull from the force of an anchor line attached at the side. Keep the paddle ready to correct the kayak’s heading and release the anchor if the hull starts turning toward an obstacle.
How should I approach an anchoring spot in moving water?
Approach from downstream of the intended position when the route allows, then paddle upstream with enough room to stop before the hazard zone. This gives you space to correct your angle instead of drifting past the target and reaching for the anchor in a rush.
Conclusion
Kayak Fishing in Current: Keep the Bow Out of Trouble comes down to a clear escape route, a controlled attachment point, and a quick release you can use from your seat. Match the anchor and scope to the bottom, keep lines separated, and move to shore or leave the water when the kayak cannot stay aligned safely.
Download the Companion Printable Reference Sheet (PDF)
Save or print our one-stop reference sheet for this guide: Moving-Water Kayak Positioning and Quick-Release Anchor Safety Checklist. Includes the full specification comparison matrix and step-by-step field checklist.