

Choose a fish finder by matching its sonar views, transducer placement, screen, navigation, and power needs to your craft and fishing method. This guide compares the sonar views and setup choices so you can judge a Black Friday bundle without paying for features you will not use.
Key Takeaways
- Traditional 2D sonar and CHIRP show depth, bottom, and targets beneath the transducer. CHIRP transmits across a range of frequencies, which can help separate nearby targets.
- Down imaging gives a detailed view beneath the craft, while side imaging scans a broader area to either side. Neither replaces every use of 2D sonar.
- Sonar displays record returning echoes, not camera footage. Movement, scan direction, mounting position, and settings all affect what appears.
- Choose a transducer mount that suits your boat, kayak, or ice setup. A strong display cannot compensate for a transducer that is blocked, turbulent, or poorly oriented.
- Screen readability, GPS and mapping, battery needs, and portability matter as much as the number of sonar modes.
Free Printable Worksheet (PDF)
Print or save the one-page companion to this guide: Fish Finder Feature Comparison and Setup Checklist. It collects the key tables and the checklist from this article.
Related fishing guides
Start with What Sonar Sends and Shows
Traditional 2D sonar sends sound pulses and displays the echoes that return from below the transducer. The unit uses those returns to show depth, bottom, and targets in the water column, while bottom returns can also give clues about hardness and changes in structure.
A fish can appear as an arch when it moves through the sonar beam. The arch is a useful clue, but it is not proof that a mark is a fish: weeds, suspended debris, and other returns can create confusing shapes.
CHIRP sonar transmits a sweep across a range of frequencies instead of relying on a single frequency. That broader sweep can help the unit distinguish targets that sit close together, making it useful when fish hold near bait, vegetation, or the bottom.
In general, lower frequencies reach greater depths and cover a wider cone, while higher frequencies show more detail over a narrower area. The cone angle describes how much water the beam covers, and the footprint grows wider as the beam travels deeper.
The screen scrolls new returns as time passes, so older information moves across the display. Read the latest returns in context with depth, bottom shape, and nearby marks instead of treating a single fish arch as a certain identification.
Compare the Sonar Views and Their Trade-Offs
The table compares the view each sonar type provides, its practical use, and its main limitation. Features can use different labels for similar views, so focus on the view and compatible transducer rather than the name alone.
| Sonar type | What it shows | Best use | Limits |
|---|---|---|---|
| Traditional 2D sonar | Depth, bottom, and targets within a cone beneath the transducer. | Tracking depth and fish while fishing or moving. | Returns are not camera images, and targets close together can be difficult to separate. |
| CHIRP | A conventional sonar view produced using a sweep across a range of frequencies. | Separating targets and reading fish in relation to the bottom or bait. | It still shows returns beneath the transducer, not a broad view of surrounding structure. |
| Down imaging | A detailed view of structure beneath the transducer, including edges and vegetation. | Examining cover and interpreting what lies directly below the craft. | It covers less area to the sides than side imaging and does not replace every use of 2D sonar. |
| Side imaging | A scrolling view extending laterally to the sides of the craft. | Searching banks, cover, and structure over a wider area. | It needs a clear lateral view and movement to build a useful record. |
| Live forward-facing sonar | A repeatedly updated directional sonar view in front of the transducer. | Watching changing returns ahead while tracking a target or presentation. | It remains a sonar display, not a camera, and depends on transducer direction and interpretation. |
Is side imaging or down imaging better for fishing? Down imaging is the closer look below the craft; side imaging is the broader search to either side. Many anglers use one to find or examine a feature, then rely on 2D sonar to track depth and targets beneath the transducer.
Side imaging is most useful when the transducer has a clear view to the sides and the craft is moving steadily enough to build a scrolling record. Down imaging concentrates detail below the transducer, so it suits checking a weed edge, drop-off, or other feature directly under the boat or kayak.
Live forward-facing sonar updates a directional view repeatedly, but it does not turn sonar into video. The return still needs interpretation, and the display direction follows the transducer orientation.
Read Returns Without Mistaking Them for a Picture
On 2D sonar, look for fish arches and repeated returns, then compare them with nearby structure and the surrounding water column. A single fish-shaped mark can be a false return, so check whether the same kind of signal appears again and whether it makes sense in the spot.
On down and side imaging, read hard edges, vegetation, and shadows in relation to the bottom and the scan direction. A shadow beside an object can help show that the object rises above the bottom, while the object’s outline and location provide more context than its shape alone.
To judge a shadow, first locate the bright return from the object, then look for the darker gap on the bottom beyond it in the direction the beam travels away from the transducer. On a side view that is often farther out from the display’s center; on a down view, use the unit’s view and beam orientation to determine the direction. A longer, distinct shadow can indicate more height or relief, but it is not a direct height measurement: beam angle, range, bottom slope, and object shape all affect its length. Compare nearby objects on the same pass or make another pass from a different direction before judging the feature.
Scrolling imaging views need movement to add new coverage. If the craft stays still, the display has little new area to record; moving too quickly or changing direction sharply can stretch, compress, or distort the scrolling image.
Use sensitivity, contrast, range, and frequency to suit the water and target. Too much sensitivity can fill the screen with clutter; too little can hide weaker returns. If the water column looks noisy, lower sensitivity gradually; if known bottom detail or weaker marks disappear, raise it. Change one setting at a time so you can tell whether the image improves.
A split-screen view can help compare conventional sonar with imaging, but each pane gets less display space. On a small screen, fine detail becomes harder to read, so switch to a full-screen view when you need to inspect a specific return.
Match the Transducer and Installation to Your Craft
A transom mount suits many conventional boats, but turbulence, hull blockage, or a poor position can interfere with returns. Place it where it stays in clean water underway, and avoid locations where bubbles or vibration disrupt the beam.
For a transom installation, start by checking the unit’s mounting template and planning a cable route before drilling. Look for a flat section with a clear sonar path, away from the propeller wash, strakes, steps, and other features that can create bubbles or block the beam. Temporarily position the transducer, set its angle according to the manufacturer’s instructions, and confirm it remains in clean water when the craft is moving. After installation, test over familiar bottom at idle and at your usual fishing speed. If the picture breaks up or depth becomes unreliable only underway, check for turbulence or blockage at the mount before trying to fix the problem with sensitivity settings.
A trolling motor mount can keep the transducer aligned with the motor, which can make it easier to scan in the direction you are fishing. Turning the motor changes the sonar view, and the cable needs enough protection and slack to handle movement without snagging.
A kayak scupper mount keeps the installation compact and can protect the transducer, but the scupper location and hull material affect the beam. Match the mount to the kayak and transducer, and make sure the installation leaves the sonar view unobstructed.
For ice fishing, use a compatible ice setup and keep the transducer oriented vertically beneath the hole. A boat transducer mount does not automatically suit an ice setup, so choose the equipment and mounting arrangement for fishing through the ice.
Kayak anglers can find more craft-specific advice in our kayak fishing guides, while our ice fishing guides cover fishing from the hardwater side of the season.
Prioritize Features for Your Kind of Fishing
Choose sonar for the questions you need to answer. Bass anglers often benefit from clear 2D or CHIRP returns for depth and targets, down imaging for examining cover, and side imaging when they want to scout a broader area.
For trolling, prioritize a readable 2D or CHIRP view that keeps depth and targets easy to follow while moving. GPS waypoints help mark productive locations so you can return to them.
Kayak anglers should weigh display size, usable controls, practical transducer mounting, and battery demands together. Choose imaging based on whether the water you fish rewards scanning below the kayak or searching to the sides.
Ice anglers should put a compatible vertical transducer setup, an easy-to-read display, portability, and battery runtime near the top of the list. Controls that remain manageable with gloves can also make a cold session easier.
| Angler type | Features to prioritize | Why they help | Practical limitation |
|---|---|---|---|
| Bass fishing | Clear 2D or CHIRP, down imaging, and optional side imaging. | Use 2D or CHIRP for depth and targets, down imaging for cover, and side imaging to scout a wider area. | More views can mean more settings to learn and more screen splitting. |
| Trolling | Readable 2D or CHIRP and GPS waypoints. | Track depth and targets while moving, then save productive locations. | Returns change with movement, so use depth and target context rather than relying on a single screen mark. |
| Kayak fishing | Compact readable display, manageable controls and power, and a compatible mount. | Fits a smaller craft and supports a practical setup; select imaging for the water you want to scan. | Screen area and battery capacity are limited by the portable setup. |
| Ice fishing | Ice-compatible vertical transducer, portable display, and suitable battery runtime. | Keeps the sonar view oriented beneath the hole and the equipment manageable between spots. | A boat installation may not suit the ice setup, and carrying gear makes weight relevant. |
GPS and mapping serve a different purpose from sonar: they help you handle, view chart information, and save waypoints, while sonar examines water and bottom around the craft. If your saltwater plan depends on target fish, cover, and feeding depth, our guide to inshore saltwater tackle explains how to match rod, reel, and line to those needs.
For broader bass planning, browse our bass fishing guides.
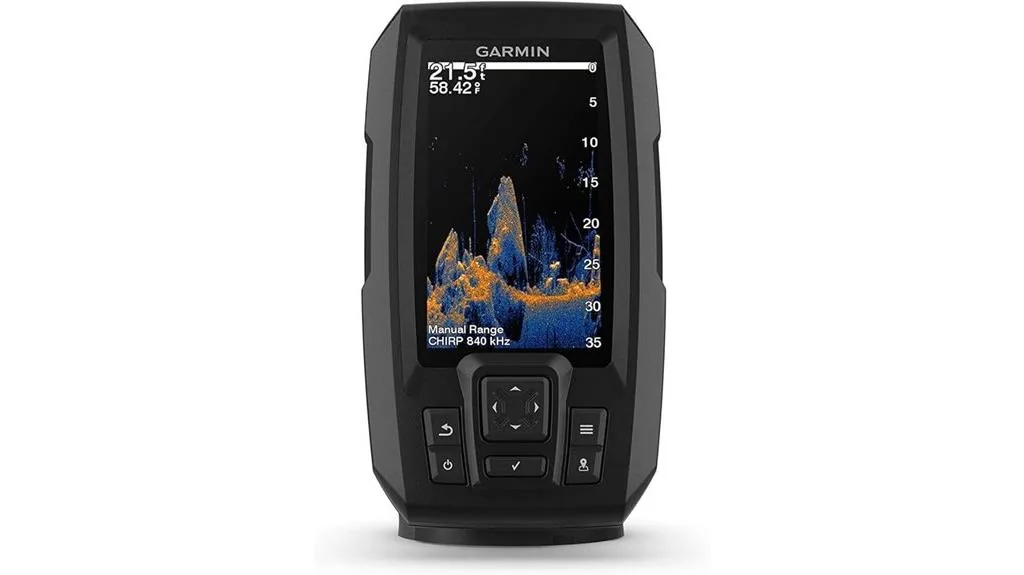
For a concrete model to evaluate against this checklist, see our Garmin Striker Vivid 4cv review; verify that the exact bundle includes the transducer and sonar views you need.
Fish Finder Buying and Setup Checklist
- Confirm sonar and transducer compatibility. Choose a unit that supports the views you want, then match its transducer to your craft and mounting position.
- Judge the screen in practical conditions. Compare display size and resolution for detail and split-screen use; consider sunlight readability, viewing angle, and controls you can operate with wet hands or gloves.
- Decide whether navigation features matter. GPS, chartplotting, mapping, and waypoint saving can help with the waters and trips you fish, but they do not replace sonar.
- Pick portable or fixed installation. A portable unit can move between craft and simplify transport, while a fixed installation keeps the display and transducer ready on one craft.
- Plan battery capacity around power draw and runtime. Allow for the display and sonar use, and account for cold conditions. Compare battery chemistry by weight, usable capacity, and charging needs instead of choosing one size for every setup.
- Review the full Black Friday bundle. Make sure its included components suit your intended sonar modes and mounting plan; a discount has little value if the setup does not fit your fishing.
- Check the setup before fishing. Secure and orient the transducer, route cables safely, set the display for the conditions, and start with a charged battery.
Keep the decision practical: choose the views you will use, make the transducer work with your craft, and give equal attention to the display, navigation, and power.
Frequently Asked Questions
Can I use a fish finder while my kayak is drifting?
Yes. A drifting kayak can use sonar, but depth changes as you cross shelves and channels, so read each return alongside its current depth rather than treating the scrolling display as a fixed map.
Do I need a separate transducer for every sonar mode?
Not always, because some compatible transducers support more than one sonar view. Live sonar systems may use a dedicated transducer, so the unit and transducer need to support the particular combination you want.
Is a split-screen view useful on a small display?
It can be useful for a quick comparison, but choose a layout that leaves labels and returns legible.
Can a fish finder show fish in shallow water?
Yes, a fish finder can show returns in shallow water when the transducer and settings suit the conditions. Targets very close to the transducer can be difficult to separate from surface clutter, so interpret them with the surrounding bottom and water column in mind.
Download the Companion Printable Sheet (PDF)
Print or save the one-page companion to this guide: Fish Finder Feature Comparison and Setup Checklist. It collects the key tables and the checklist from this article.
Published by The Reel Authority, a publication of Viking Trading Group LLC.